

Why Upgrade To SOLIDWORKS 2022? - New Feature "STUD WIZARD"
If you're SOLIDWORKS user, either one or all of these questions might be lingering in your mind :
" Why are these updates every years ? "
"Are these new features worth to upgrade ? "
" Why should I upgrade my SOLIDWORKS ? "

Product engineers will always think about how to improve their productivity and shorten time to market. Upgrade version of SOLIDWORKS is one way to improve productivity as it allows you to work smarter, faster and together.
SOLIDWORKS launched many new features in 2022. The features include detailing mode, drawing tools, modelling and more useful features that can help to increase productivity. Thus, we will focus on the new feature in SOLIDWORKS 2022 part modelling that could accelerate your design process.

Historically, SOLIDWORKS released Thread feature in 2016 and offered designer a simplified approach to create helical thread geometry for more accurate and realistic representation of threads. This threat feature is extremely high performance to create the complex geometry that resulted in significantly slower rebuild time in SOLIDWORKS.
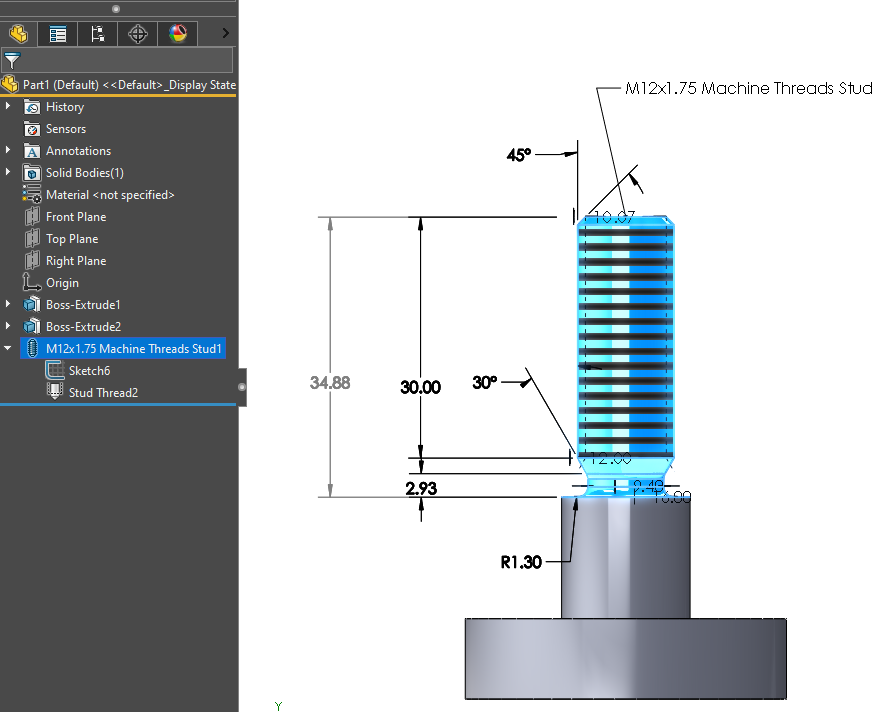
The Stud Wizard is a convenient alternative to the external threaded stud feature to reduce file size and complexity for higher volume of manufacturing. The stud wizard also improve the appearance of cosmetic threads, breathing new life into your design.
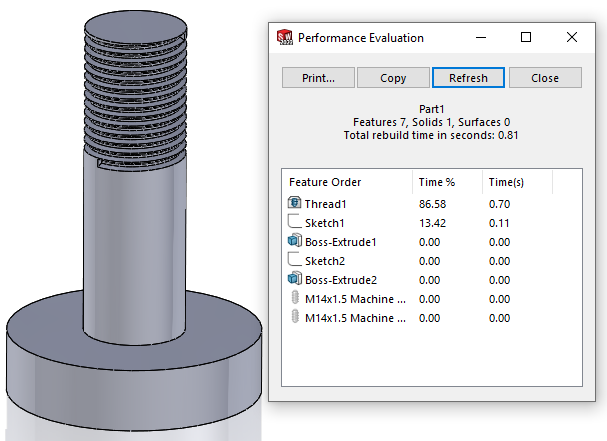
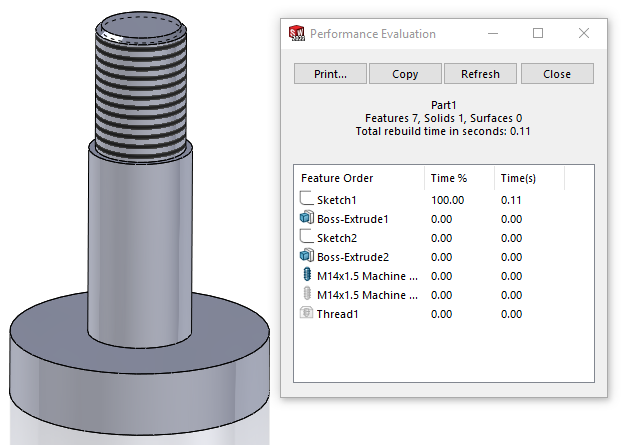
Thread Feature Stud Wizard
Pictures show that the performance evaluate difference between Thread Feature and Stud Wizard. Both of the time taken to rebuild model are 0.81 and 0.11 second respectively, time is shorten by 86% with Stud Wizard.

By default SOLIDWORKS interface setting, the stud wizard feature could be found in Command Manager > Features Tab > Drop Down Arrow of Hole Wizard > Stud Wizard.
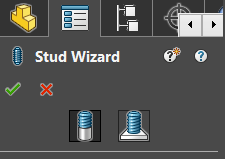
There are two different options in Stud Wizard : Created Stud on a Cylindrical Body and Creates Stud on a Surface.
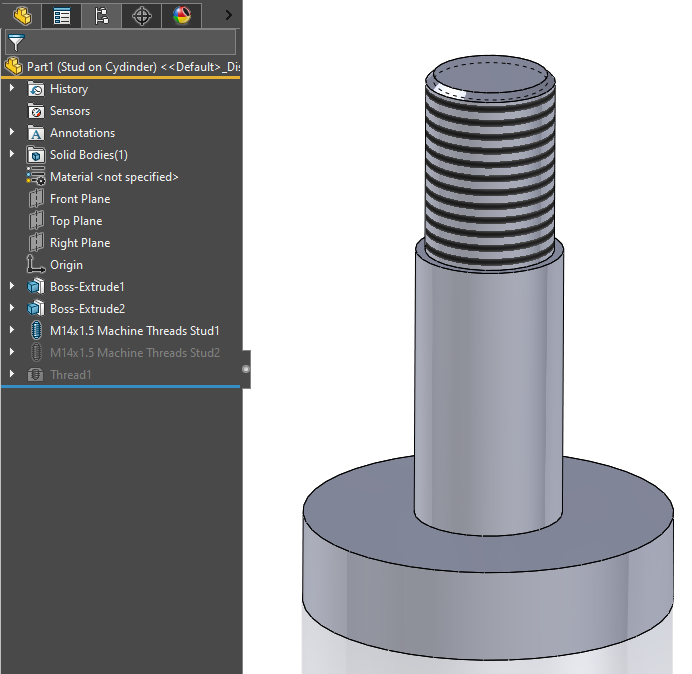
- Create Stud on a Cylindrical Body
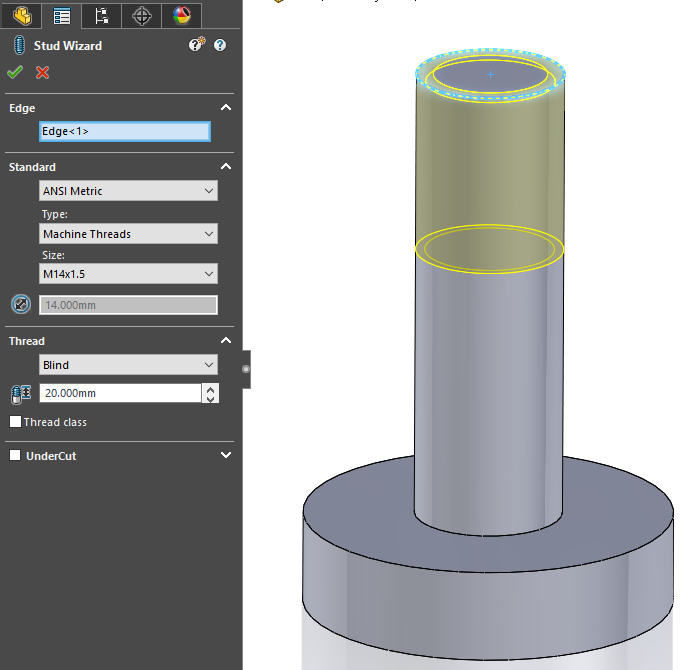
As the name, this option could be only been applied on cylindrical extruded or revolved boss.
- Step 1 : First selection is a circular edge on the model representing the threads of the stud should start.
- Step 2 : Select the standard of the threads (Machine threads/ Straight pipe tapped), this selection is similar to the Hole Wizard.
- Step 3 : Define the Thread Size, the maximum of available thread size is depend on the cylindrical extrude size. (Thread Size < Cylindrical Shaft Size)
- Step 4 : Specify the end condition of the thread, depth and thread class.

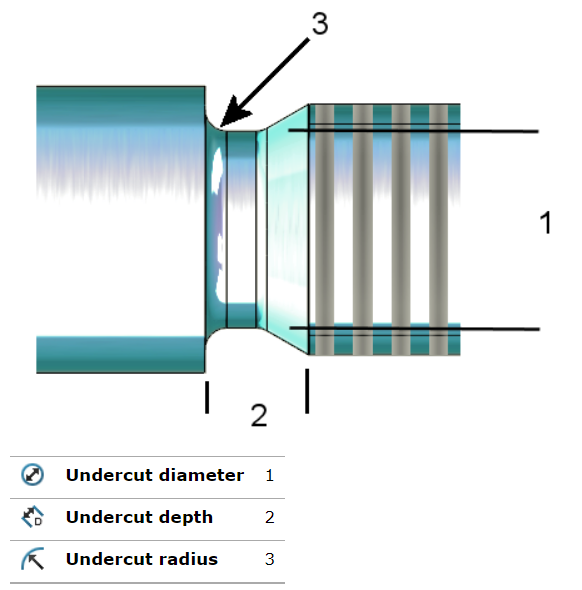
- Step 5 : Add undercut at the end of the thread of the stud to provide clearance.
2. Creates Stud on a surface
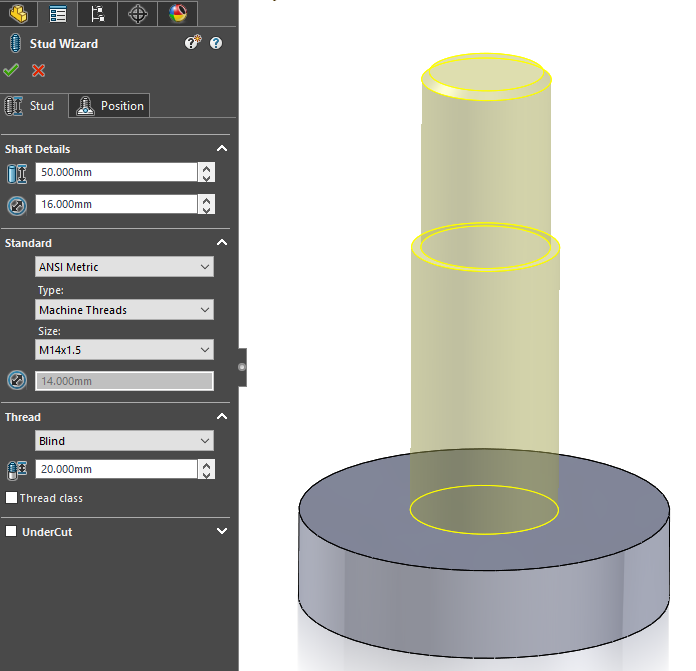
In Creates Stud on surface, this option is similar to Creates Stud on Cylindrical Body but there is two more settings which are Cylindrical Shaft Details and the position:
- Shaft Details - Specify the length and diameter of the shaft
- Position - Define the cylindrical shaft centre and its starting plane.
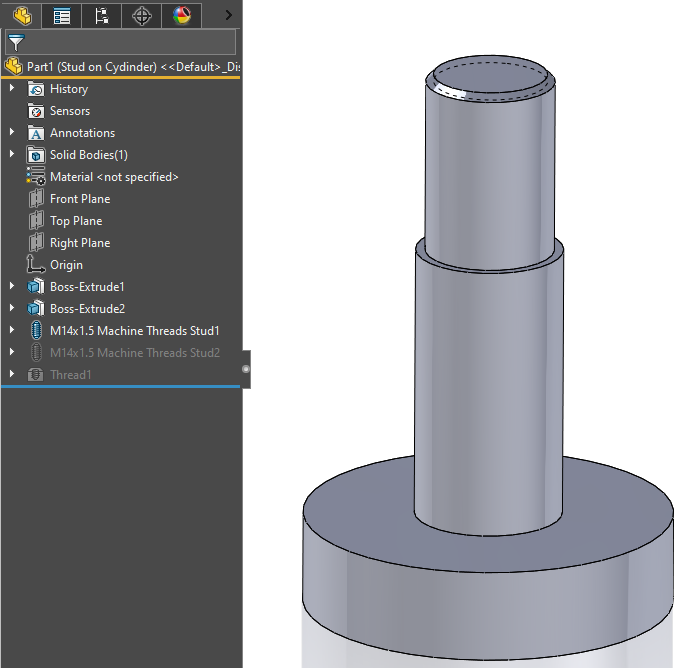
Both methods are able to create exactly same Stud.
3) To View The Threads
In SOLIDWORKS default setting, the threaded shaded shape will show even the stud feature has created successfully. The reason is because the default setting of displaying the shaded cosmetic threads was turned off.

The cosmetic threads display setting could be found in:
Options > Document Properties > Detailing > Display Filter > Shaded Cosmetic threads
Lastly, the cosmetics thread shaded shows as the setting update.