

Installing & Activating SolidNetwork License Manager
SolidNetwork License Manager must be installed and activated before client machines can open SOLIDWORKS and obtain the licenses. The License Manager can be installed on a standalone server connected to the network, or on a client machine running SolidWorks. If installing on a standalone server, only the License manager needs to be installed, i.e, it is not needed to install the entire SolidWorks application.
Here are the following steps:
- Ensure login as user with ADMINISTRATOR RIGHTS
If there are no administrator rights, please contact your MIS/IT department for login as a local user with administrator rights.
- Please note that if you are using an anti-virus, it is possible that it may block the installation of the SolidWorks software or Windows components. Hence, one may need to turn anti-virus off during install and reboot of the system.
- Ensure Windows firewall is disabled
Consult your MIS/IT department on disabling the firewall
- Make sure no clients PC borrow out license from the current SolidWorks License Server, all clients which using SolidWorks please close SolidWorks and no license is being used during this upgrade process
- Locate the SolidWorks installation file (from the installation disc/USB/Downloads from customer portal)
- Run Setup.exe
- Select “Server Products” and “install SolidNetwork License Manager” and click “Next”

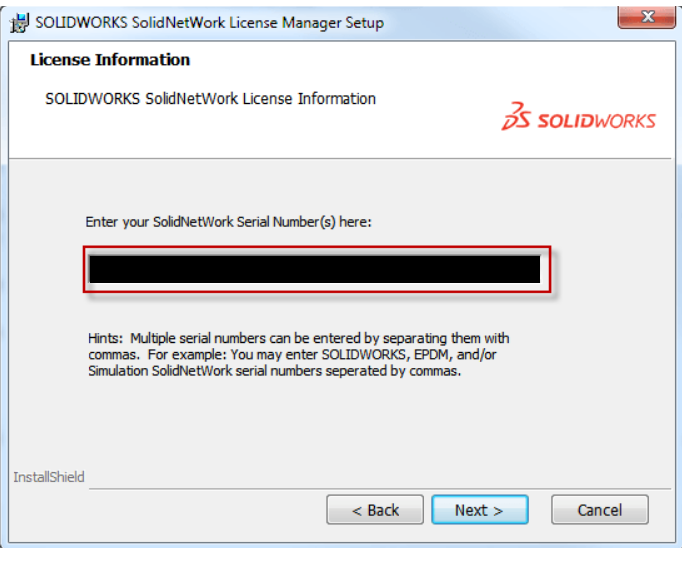
- Enter the SolidWorks Network Serial Numbers.
If there is multiple serial numbers, one can separate by adding commas(,)
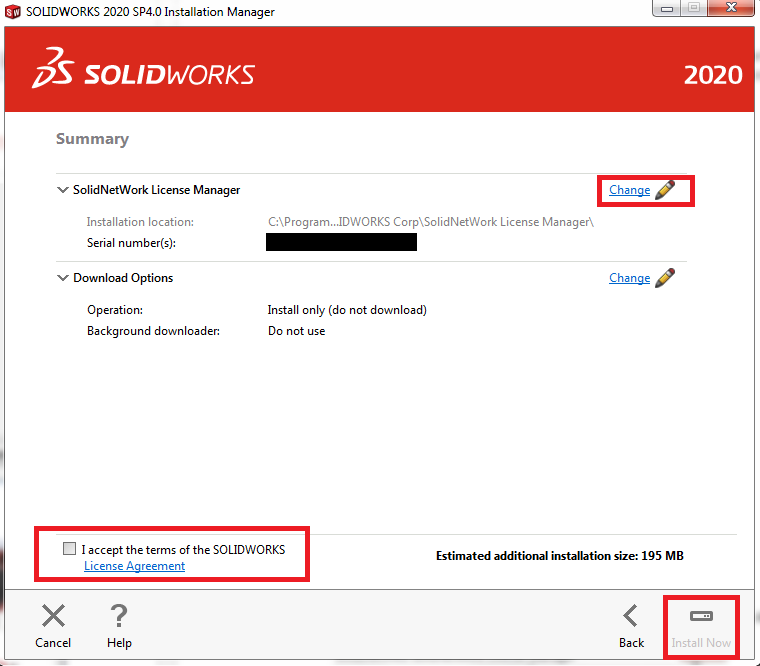
- If required, Click “Change” to modify the default installation location

- Click “I accept the terms of the SOLIDWORKS” and “Install now” to begin installation.
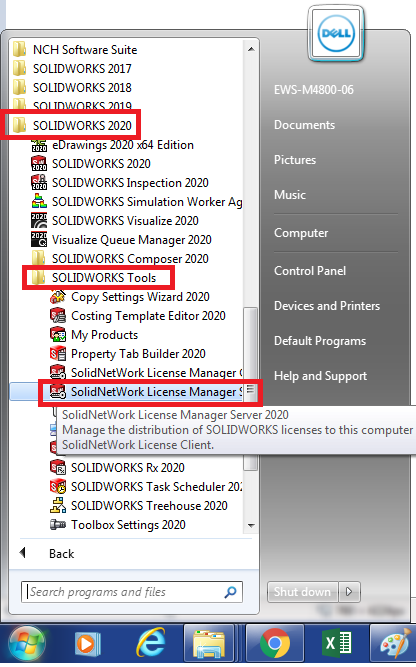
- After installation, Launch SolidNetwork License Manager Server from Start menu (Start>All Programs> SolidWork 20XX > SolidWork Tools> SolidNetwork License Manager)

- A dialog box should appear “No SolidNetwork License(s) exist, would you like to activate now?” Select “Yes”

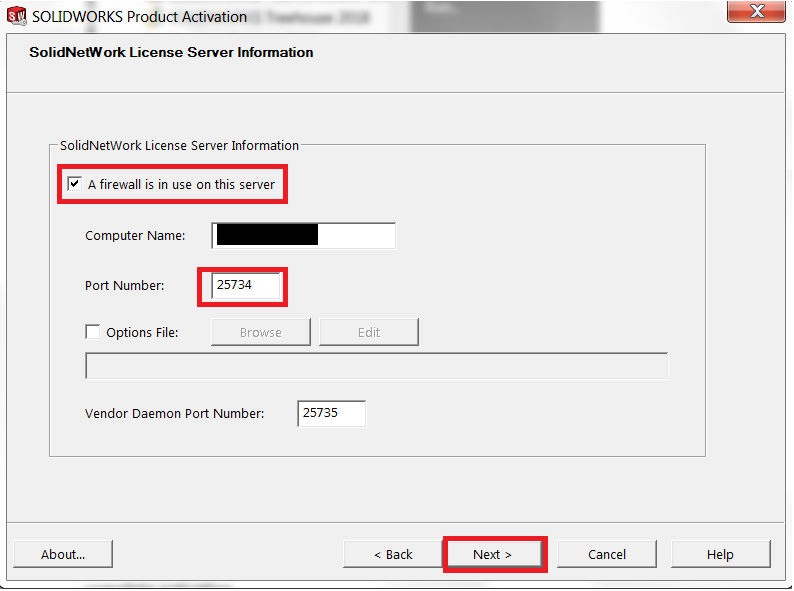
- One will then need to configure the License Manager based on the network port/firewall configuration. The server computer name is displayed and will be required for the clients to connect to the server.
Note that Default port number is 25734 but it can be modified if the port is already in use.
If a firewall is enabled on the computer, check “A firewall is in use on this server”. This will use port 25735 by default
- Both ports 25734 and 25735 would need to be allowed in the firewall for licenses to go through to the client machines.
- To activate and obtain the SolidWorks license: Select the product to activate (or click “Select all”, and the activation method. If the computer has an active internet connection, then one can select “Automatically over the internet”. Enter the email address and click “Next” to complete activation.


If there is no internet connection, choose ‘Manually via email’ to save a request file that can be transferred to another computer with internet access (eg. via USB). The file ‘SWActivateRequest’ is to be emailed to activation@solidworks.com. One will receive a
Reply after a few minutes with a file called ‘SWActivateResponse’. Copy this file to the
desktop of the SolidWorks machine, return to the Manual activation and ‘Open’ the
SWActivateResponse file to complete the activation.
16. If activation is successful, it will appear in the Result, then click on “Finish”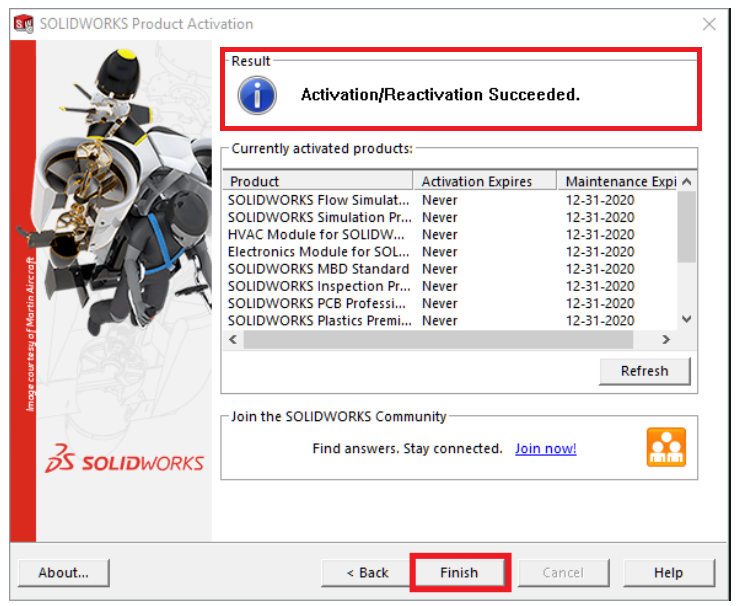
- For all Technical Support related queries please send an email to support@seacadtech.com or contact us at +65 6226 3784
- To know more about our products, email us at marketing@seacadtech.com or contact us at +65 6372 1416
- Learn more about our training programmes and courses here